How to show your name and title on Zoom, Teams, Google Meet and Webex
Every meeting app shows your name differently, and none of them show your title well. Here's what each one does on its own, and how to add both to your video.
'%3e%3crect%20x='46'%20y='72'%20width='208'%20height='156'%20rx='14'%20fill='%23fff'/%3e%3cpath%20d='M46%20122V86a14%2014%200%200%201%2014-14h180a14%2014%200%200%201%2014%2014v36z'%20fill='%230a0f1c'/%3e%3cpath%20d='M112%2097h76'%20stroke='%23fff'%20stroke-width='7'/%3e%3cpath%20d='M78%20186c8-26%2016-32%2018-20s-10%2030-4%2028%2014-34%2022-30-6%2026%202%2024%2012-20%2020-18%200%2016%208%2014%2018-14%2034-12'%20stroke-width='6'/%3e%3cpath%20d='M78%20206h144'%20stroke-width='4'/%3e%3crect%20x='46'%20y='72'%20width='208'%20height='156'%20rx='14'/%3e%3c/g%3e%3c/svg%3e)
People on a call should be able to tell who you are and what you do without asking. Every meeting app shows some name for you, but where it comes from, whether you can change it, and whether your job title appears at all varies from app to app.
This guide covers what each app does on its own, the usual workarounds, and how to put your name and title on your video so they show up the same way everywhere.
What each app shows by default
Zoom
Zoom shows your display name in the corner of your video tile. It comes from your Zoom profile.
- To change it for every meeting, edit your display name in your profile on the Zoom website.
- To change it for one meeting, open Participants, hover over your name, click More, then Rename. The host can turn renaming off, so the option may be missing in some meetings.
Your job title isn’t shown on your video tile. A common workaround is to type it into your display name (“Sam Rivera · Solutions Engineer”), which works until the name gets cut short in a small tile.
Microsoft Teams
Teams shows the name from your organization’s directory, the same one you sign in with. In most companies you can’t change it yourself; IT controls it. Your title appears on your profile card when someone hovers over or clicks your name, but not on your video.
Google Meet
Meet shows the name on your Google account. With a work account, your organization’s admin often controls it. Guests who join without signing in type a name when they join. Titles aren’t shown on video.
Webex
Webex shows the display name from your Webex profile, which you can usually edit in your profile settings unless your organization manages it. Titles aren’t shown on video.
The common workarounds, and where they fall short
Putting your title in your display name. Quick, but it only works in apps that let you edit your name, it gets cut short in small tiles, and it disappears when someone pins a screen share.
A virtual background with your name on it. This gets your name onto the video itself, which is better. But each person needs their own image, someone has to remake it when a title changes, and text behind you is hidden whenever you lean into frame. It also looks backwards to you in your own preview. Most apps mirror your self-view, but everyone else sees the text the right way round, so don’t flip the image.
Asking people to introduce themselves. It’s the default for a reason, but it spends the first minutes of every call on information that could be on screen.
Put your name and title on your video
The approach that works in every app is to add the name and title to the video before the meeting app gets it. Broadcasters call this a lower third: the caption at the bottom of the screen that tells you who’s speaking.
Nametags does this on your own computer. It reads your real camera, adds your tag, and offers the result as a camera called Nametags that any app can use. Because the tag is part of the video, it looks the same in Zoom, Teams, Meet, Webex, Slack huddles and anything else that lets you choose a camera, including recordings.

Set it up
-
Install the app from the download page. There are versions for macOS, Windows and Linux. The quickstart walks through the Mac setup, which takes about five minutes.
-
Fill in your tag. On the You tab, enter your Name, Role and Company, and add a logo if you like. The preview updates as you type. If your company uses Nametags, some of this may be filled in or locked for you.
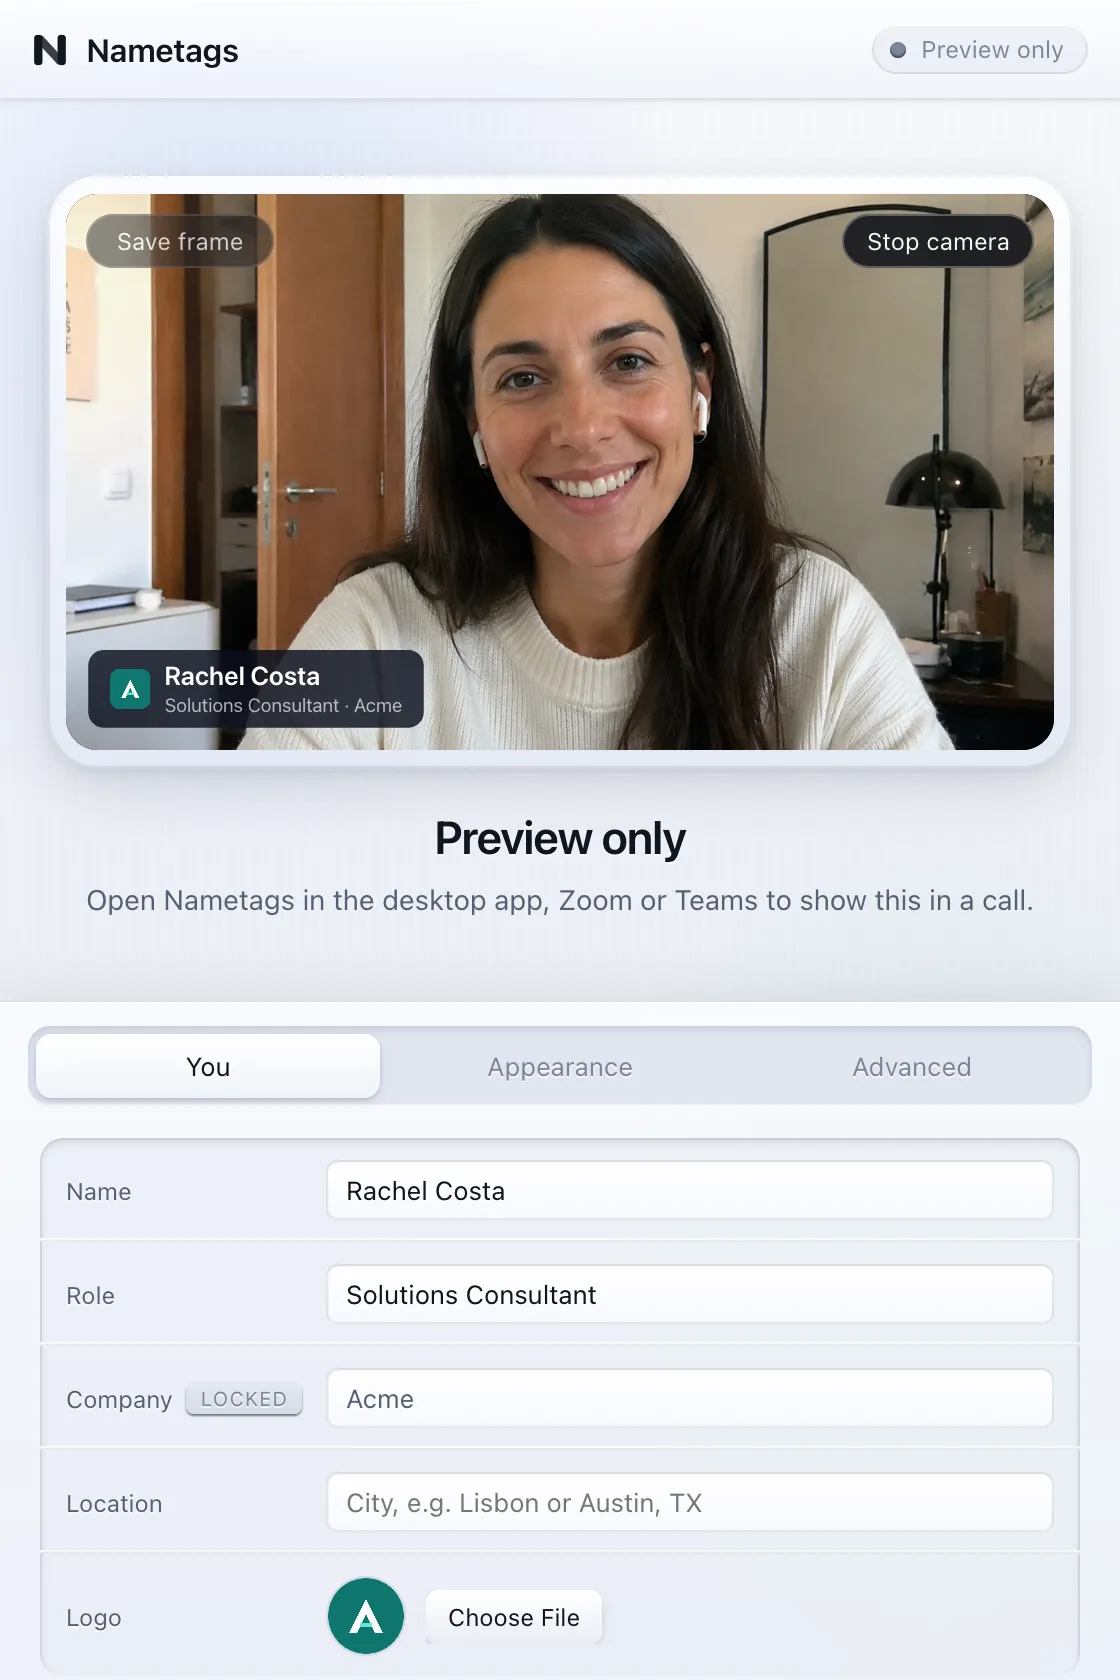
The You tab. Company shows a Locked badge because the organization sets it. -
Pick the Nametags camera in each meeting app. You only do this once per app:
- Zoom: Settings → Video → Camera
- Teams: Settings → Devices → Camera
- Google Meet: on the preview screen, click the camera name under your video
- Webex: on the preview screen, click the arrow next to Start video
The meeting apps guide has the full steps for each, plus Slack.
Don’t see Nametags in the camera list? Quit the meeting app completely and open it again. Most apps only look for cameras when they start. For Google Meet in a browser, reloading the tab is enough.
Only use Zoom?
You don’t need the desktop app. The Nametags Zoom app runs in a panel inside Zoom and fills in your tag from your Zoom profile the first time you sign in. It only works in Zoom meetings, so if you also use other apps, the desktop camera is the better choice.
Make it look right
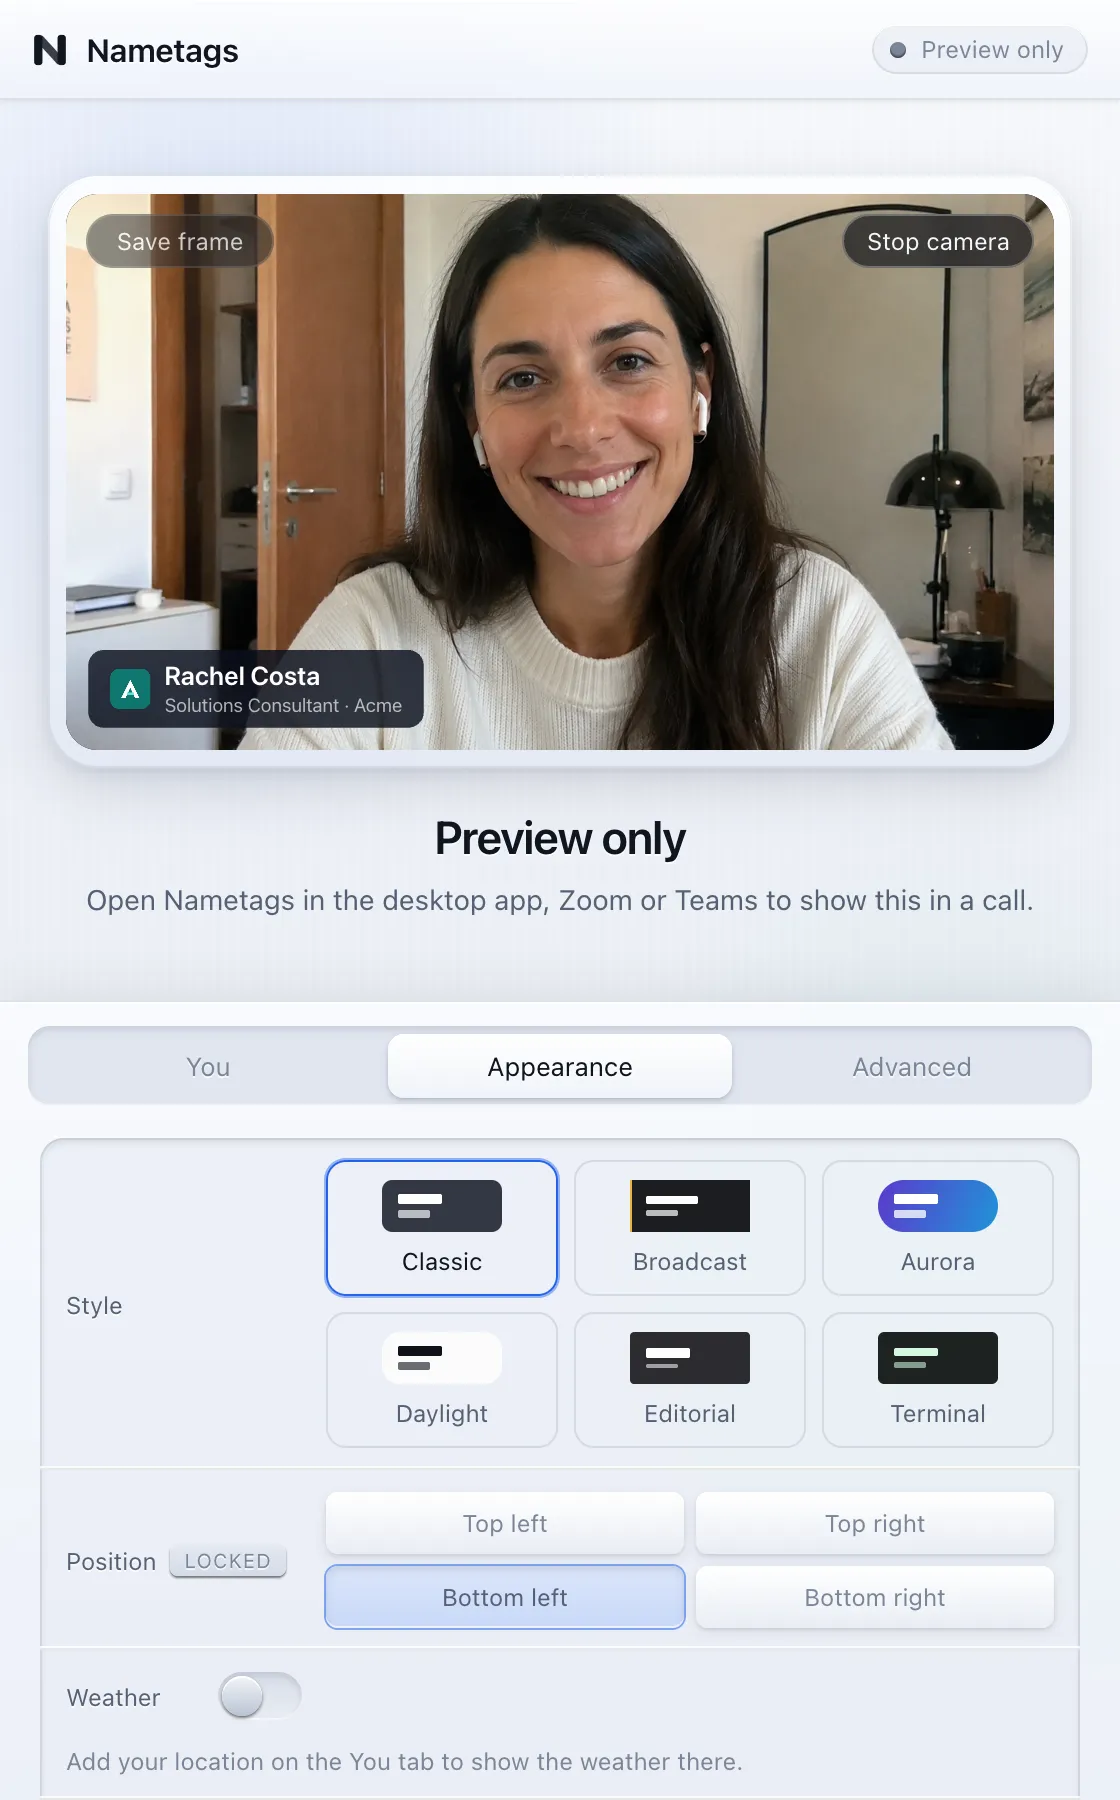
- Pick a corner your face doesn’t cover. Most people sit in the middle of the frame, so a bottom corner usually works. You can move the tag to any corner under Appearance → Position.
- Choose a style that suits your room. Classic reads well against anything; Daylight is a light tag for dark rooms and dark clothing. There are six styles in all, described in Your nametag.
- Keep the title short. “Solutions Engineer” reads at a glance. “Senior Principal Solutions Engineer, Strategic Accounts, EMEA North” doesn’t.
- Check it in the preview with Use camera before your first call.

Doing this for a whole team
If you’re setting this up for more than yourself, you probably don’t want everyone typing their own title and choosing their own colors. In the admin console, admins can lock the company name and logo, fill in titles from your identity provider, and set stricter rules for groups such as executives. Start with how to run a pilot with one team.
'%3e%3cpath%20d='M104%20196h92l-12%2056h-68z'%20fill='%23fff'/%3e%3cpath%20d='M96%20184h108v14H96z'%20fill='%23fff'/%3e%3cpath%20d='M150%20184c-2-30%202-58%200-96'/%3e%3cpath%20d='M150%20150c-30%202-44-14-46-34%2022-2%2042%2012%2046%2034z'%20fill='%23fff'/%3e%3cpath%20d='M151%20118c26%200%2040-16%2042-36-22%200-38%2014-42%2036z'%20fill='%23fff'/%3e%3cpath%20d='M150%2088c-6-10-4-22%200-30%206%208%206%2020%200%2030z'%20fill='%230a0f1c'/%3e%3c/g%3e%3c/svg%3e)
'%3e%3crect%20x='62'%20y='92'%20width='176'%20height='116'%20rx='8'%20fill='%23fff'/%3e%3cpath%20d='M40%20216h220l-14%2018H54z'%20fill='%23fff'/%3e%3cpath%20d='M174%20150a24%2024%200%201%201-8-18'%20/%3e%3cpath%20d='M166%20116l1%2017-17%201'%20/%3e%3cpath%20d='M206%2062c-2-16%2022-20%2026-6%204-14%2030-10%2028%206%2012%200%2014%2018%200%2018h-52c-14%200-14-18-2-18z'%20stroke-width='5'%20stroke-dasharray='2%2010'/%3e%3c/g%3e%3c/svg%3e)
'%3e%3crect%20x='42'%20y='58'%20width='216'%20height='148'%20rx='10'%20fill='%23fff'/%3e%3ccircle%20cx='178'%20cy='112'%20r='24'/%3e%3cpath%20d='M132%20206c4-36%2022-52%2046-52s42%2016%2046%2052'/%3e%3crect%20x='58'%20y='172'%20width='58'%20height='20'%20rx='5'%20stroke-width='5'%20stroke-dasharray='2%2011'%20/%3e%3cpath%20d='M150%20206v34M112%20246h76'/%3e%3c/g%3e%3c/svg%3e)